DIY de-nitrator

so the other day i was testing my water and i noticed that my nitrates were starting to go up a little bit. they’re at 10 ppm now which i know people say isn’t too too bad, but i still am not comfortable with it. I’ve been regular with my water changes, but i wanted to start doing a little more, so i decided to start researching de-nitrators. then i found a large following on this topic of DIY coil de-nitrators. Any time i have the opportunity to combine my two favorite hobbies (building gadgets and <) i tend to hop on it. Of course, this weekend I had a whole bunch of stuff i needed to do, so i did what any responsible person would and ignored them all to take care of my tank. anyway, in a few hours of work, here’s what i came up with…

Total supply cost ~$40

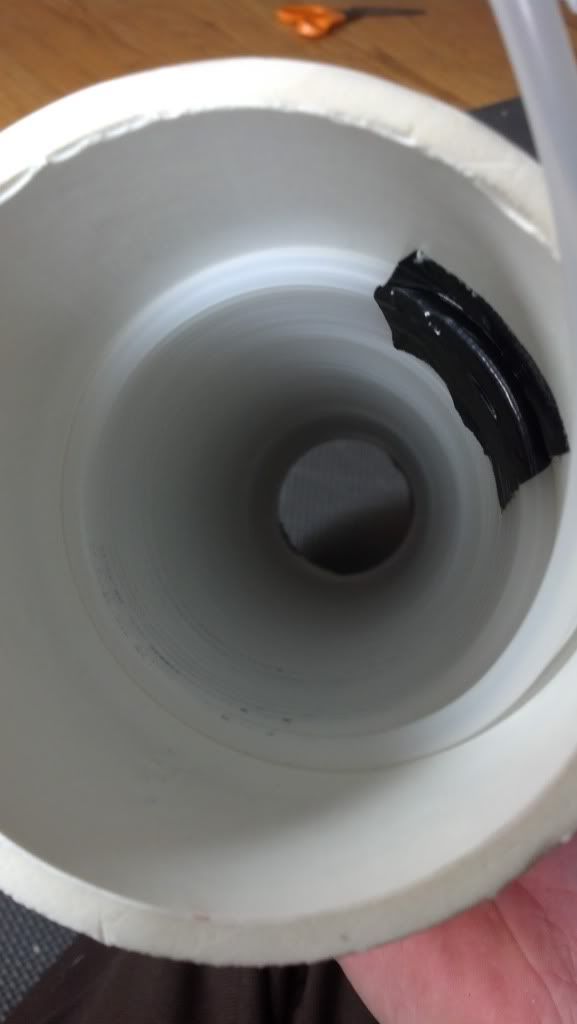
80’ coiled 1/4" O.D. tubing. The duct tape is to hold the end in place as i continued to coil. This was the most laborious part of the project. Some people said they heated the tube up first to make it more pliable, but i bought the last continuous segment Lowe’s had and HD doesn’t sell it in custom lengths so i didn’t wanna mess it up.

Coils Completed.

90 elbow added to the bottom end of the tubing. This will force the water to start by flowing into the chamber downwards to elongate contact time.

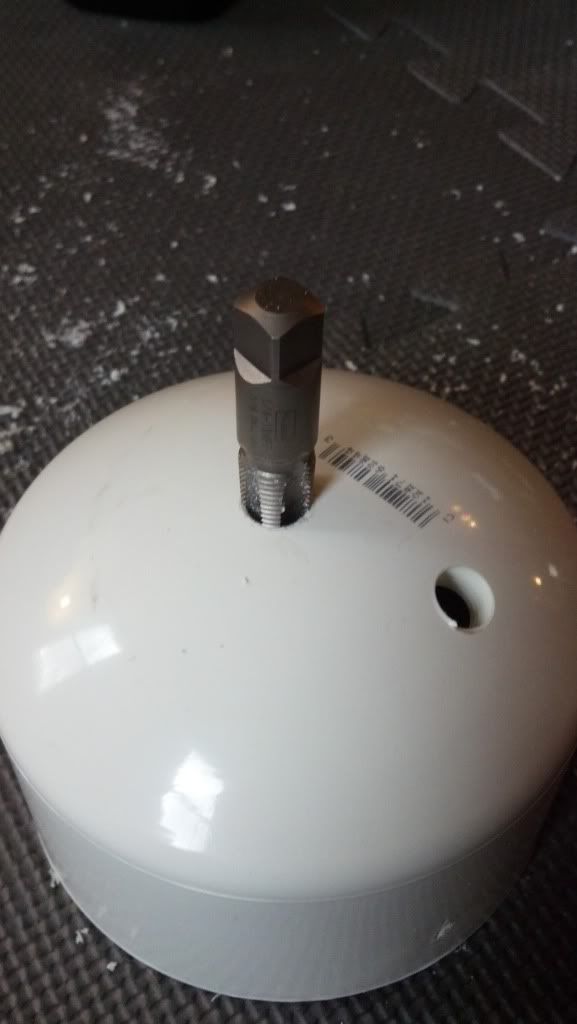
Tapping holes for inlet and outlet.

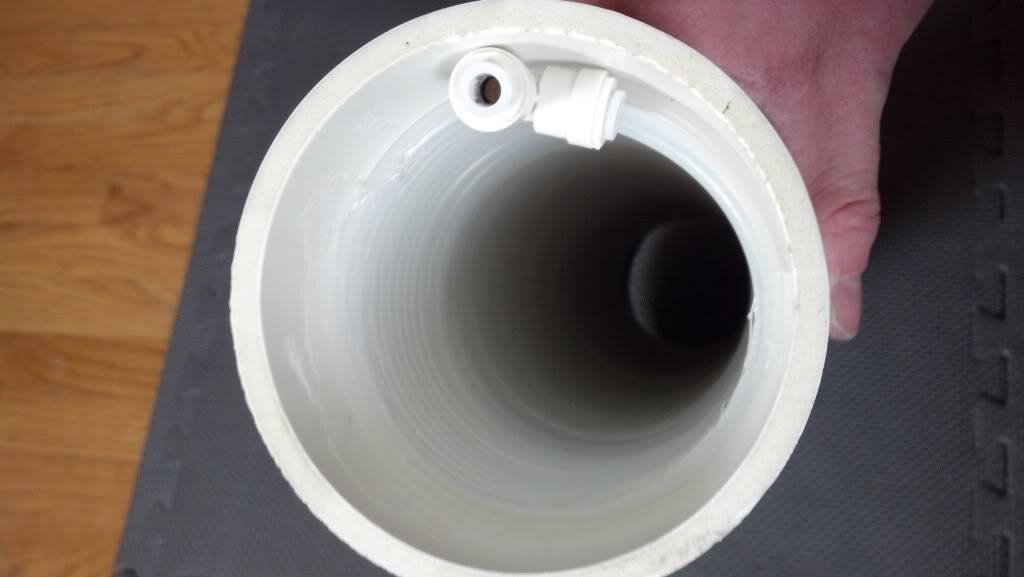
connections threaded and siliconed. Unfortunately, after leak testing, i discovered the outlet valve leaks from the top of the valve body. I guess maybe they’re not meant to be mounted vertically. Either way, i had to replace it with a regular connection like the inlet has, which was unfortunate because it did an excellent job of controlling flow when it wasn’t leaking.

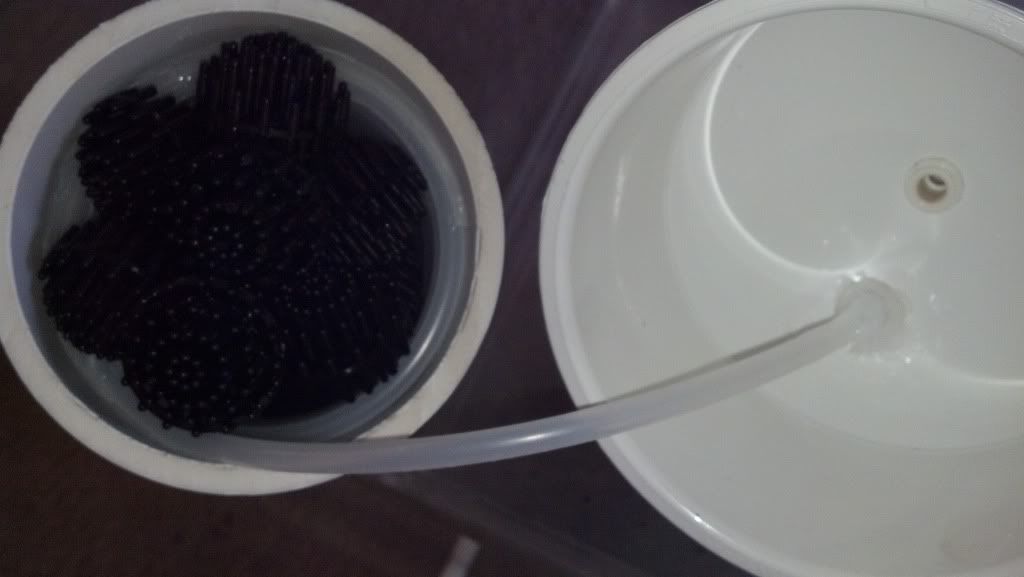
chamber filled with bioballs and coil siliconed to the inlet connection

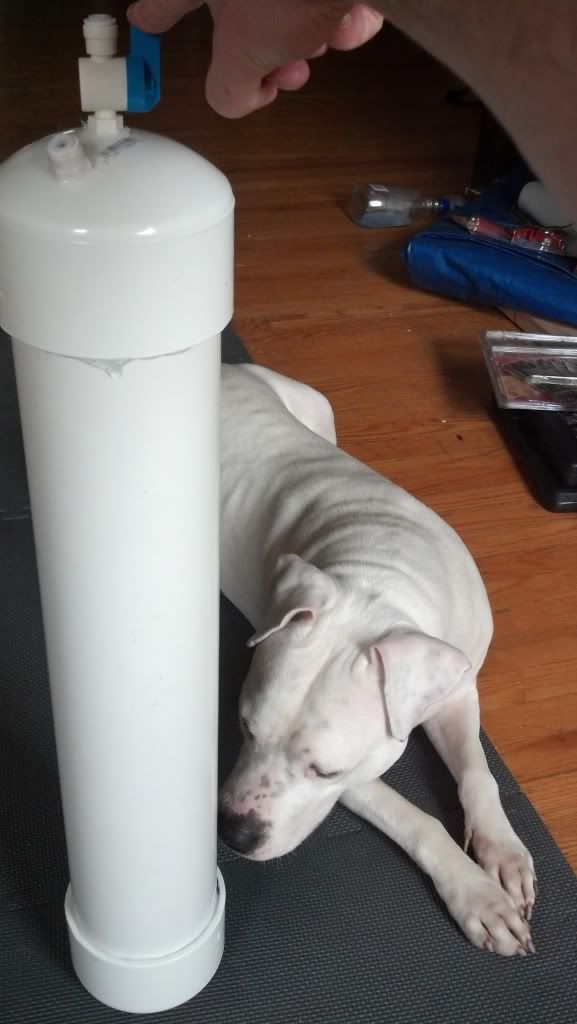
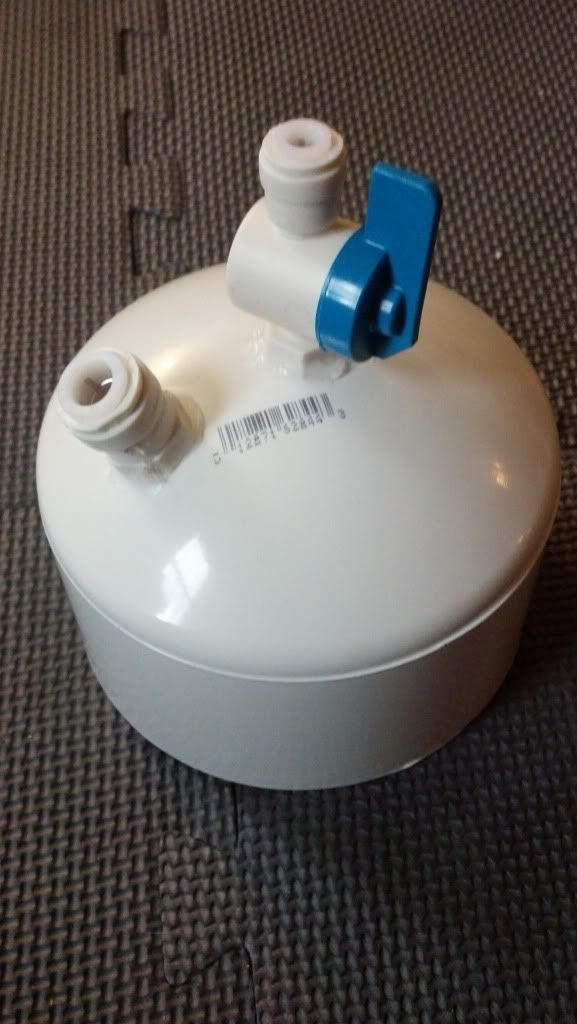
chamber sealed up and quality assurance inspector giving the final look over. It’s important to note that once these babies are sealed, they’re sealed for good.

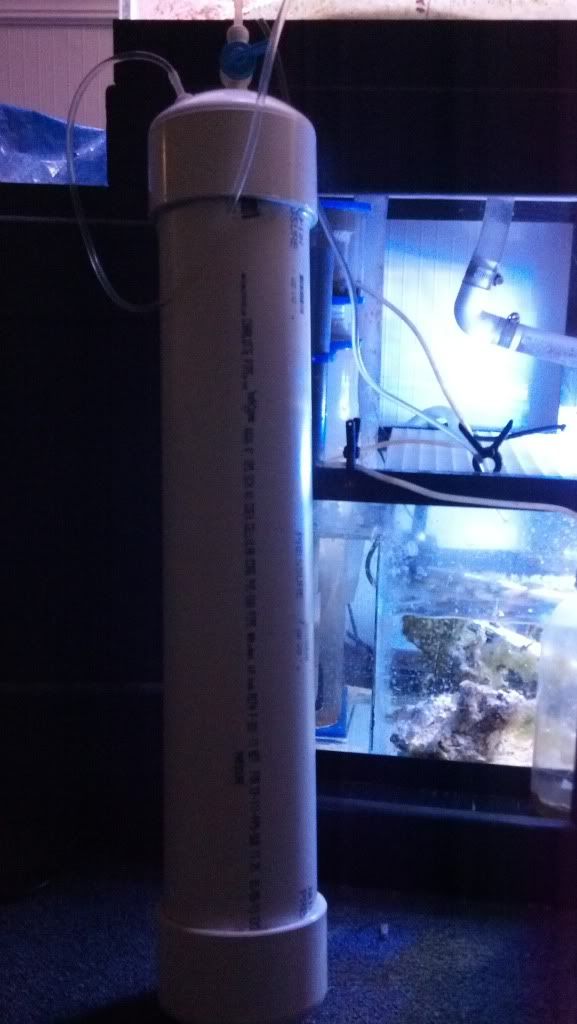
leak testing the final product. This is where i discovered the valve body leak. But once it’s finally set up, this is how it’ll be. It will take suction from the overflow area and discharge into the sump. The project is completely gravity fed and obviously silent, which is what attracted me to the project in the first place. No maintenance, no added power costs and no noise. And with the success that so many people seemed to have with them, I figured it was worth the time.

So now we wait. From what i’ve been told, it takes about two weeks to be fully cycled and then another month or two to completely remove the nitrates from the system. So there will be updates to follow. But from then on, there’s nothing to it. Set it and forget it. So fingers are crossed.

I like it!!

can you go in to little more detail on flow? How does the water start? I understand it will be constant once running, but is it a matter of starting a siphon manually or are you actually tying in to the overflow flow and having it push watyer through the denitator?

Are you suppose to add the bacteria to start the culture? I read somewhere that you can do that to get it going faster or add more bacteria to to the unit. BTW great job on the DIY. Please keep us posted on the result.

I’m also a big fan of the Pounder PBR can sitting there for motivation. :BEER

Can you explain the need for 80 feet of tubing. And what are the dimensions of the tube. What size PVC did you use? Nice job. hope it works ::thumbsup::

Thanks

I love DIY projects myself but from all the reading I have done a coil denitrator is nothing more than a manufactured Liverock without the added micro/macro fauna and you could accomplish the same thing by adding the appropriate piece of Liverock. Also if the flow through it stops and the bacteria die off they can release hydrogen sulfide.

[quote=“houndsbayman, post:5, topic:6151”]
Can you explain the need for 80 feet of tubing. And what are the dimensions of the tube. What size PVC did you use? Nice job. hope it works ::thumbsup::

Thanks[/quote]

[quote=“Hudzon, post:6, topic:6151”]
I love DIY projects myself but from all the reading I have done a coil denitrator is nothing more than a manufactured Liverock without the added micro/macro fauna and you could accomplish the same thing by adding the appropriate piece of Liverock. Also if the flow through it stops and the bacteria die off they can release hydrogen sulfide.[/quote]

The answers for this are kind of one in the same. what separates this from the normal live rock filtration is the coil. At first i wasn’t sure why the coils were entirely necessary so i pursued a little further. As the water goes down the coil, colonies of aerobic bacteria develope. These aerobic bacteria remove oxygen from the water. By the time the water has reached the bottom of the coil, conditions are perfect for anaerobic bacteria. These anaerobic bacteria are what do the serious nitrate removal, but can only survive in oxygen deprived conditions, hence why the coils are necessary. As for the hydrogen sulfide situation, the most important part of all this is maintaining SLOW flow. I’m talking two drips a second is my throughput. This way, the coloniies remain relatively steady preventing massive die offs and hydrogen sulfide poisoning. Also, the pvc is 2’ of 4" pvc. From what i’ve read its size makes it effective up to a 75 gal. anymore than that and i’ve read recommendations for a second for maximum nitrate removal.

[quote=“Cdangel0, post:4, topic:6151”]
I’m also a big fan of the Pounder PBR can sitting there for motivation. :BEER[/quote]

essential to the success of any project.

[quote=“reefman66, post:3, topic:6151”]
Are you suppose to add the bacteria to start the culture? I read somewhere that you can do that to get it going faster or add more bacteria to to the unit. BTW great job on the DIY. Please keep us posted on the result.[/quote]

I’ve heard of people dosing with vodka or sugar water and i want to do it, i’m just unsure of the procedure and nervous about killing things ha

[quote=“Cdangel0, post:2, topic:6151”]
I like it!!

can you go in to little more detail on flow? How does the water start? I understand it will be constant once running, but is it a matter of starting a siphon manually or are you actually tying in to the overflow flow and having it push watyer through the denitator?[/quote]

I actually use a small desktop fountain pump to start the flow. But once it’s going, i stop the pump and the syphon does the rest. But again, my throughput is only two drops a second, so it would take A LONG time to drain any significant amount of water in the event of a power failure.

Yes, you got it exactly about the transition of bacteria types through the tubing length. 2 drops a second is only about 2.25 gallons a day. about 20 drops per ML. so it works very slow.

FYI i did end up deciding to vodka dose. i spent a day researching it and decided that as long as i’m careful and i do low doses, i shouldn’t have a problem. i’m only doing it to kick-start the de-nitrator, then i’ll be weaning the tank off. I plan on doing about .2 mL for a week, .4 mL for the second week, then going back down. I figure that’s a lot less than what people normally recommend, but should be enough to get the de-nitrator up and running.

any updates on it?

I was hoping to have some positive results by now. It’s been a frustrating journey of anticipation though. I tested the water about a week after i set the thing up and oddly enough, the levels coming out of the denitrator were actually higher than the tank itself. I checked a second time just to make sure i didn’t switch vials. then another week after that i checked again, and the denitrator levels and the tank levels were the same. We’re almost at the end of week three now, so I’m hoping to have something to show for it by monday, but i’m starting to worry something went wrong inside the denitrator when i was assembling it. the coil inside doesn’t really have a secure way of attaching to the inside of the cap, so to attach, i used a good amount of silicone, waited over a day and made sure to be very gentle when finally enclosing the whole thing. That being said, I’m worried the bond didn’t hold. We’ll see what happens though. Vodka dosing also didn’t seem to help too much, but like i said, i only did minimal amounts and only for two weeks just to try and kick-start the denitrator. I have to increase my water changes, as my nitrate levels are still worrisome. Hopefully i’ll have some better news by sunday at the end of week three.

Did you notice any skimmate changes when vodka dosing? I also did it with my small tank before… i started at a really low dose as well, but as i got closer to the recommended dosing amount the skimmer went crazy producing scum. the skimmer was a pia to service otherwise i woulda kept at it for longer…

yeah definitely noticed a difference, not just in the amount, but also in the color. My skimmer normally works pretty well anyway, esp since it’s just one of those cheapo eshopps, but i’m always emptying it and it’s always dark dark stuff. makes low tide smell like fresh laundry.

[quote=“alexzobi, post:13, topic:6151”]
yeah definitely noticed a difference, not just in the amount, but also in the color. My skimmer normally works pretty well anyway, esp since it’s just one of those cheapo eshopps, but i’m always emptying it and it’s always dark dark stuff. makes low tide smell like fresh laundry.[/quote]

That smells sounds like its working ::thumbsup::

I run three different type of denitrators, a 6 ft heterotrophic with methanol, a six foot and a 3 foot sulfur denitrator and several biopolymer denitrators with a gallon of beads in each. I can tell you that the heterotrophic denitrator (ethanol, methanol, acetic acid, and sucrose - I have tried them all) is the least effective and gives me the greatest problems. I have been extremely impressed with the bioploymers having run two DIY reactors for ~ 6 months. In one system, I feed ~ 1 pound of food a night and not until I added the biopellet reactor did the nitrates drop below 50. They are currently zero and I have turn off both the sulfur and heterotrophic reactor in that system.

Yes, Alprazo, the plasti pellets work very well at consuming nitrates and phosphates. you must have a reall good protein skimmer to suck out the excess mulm and bacteria slime they produce, and thus export the trates.

[quote=“alprazo, post:15, topic:6151”]
I run three different type of denitrators, a 6 ft heterotrophic with methanol, a six foot and a 3 foot sulfur denitrator and several biopolymer denitrators with a gallon of beads in each. I can tell you that the heterotrophic denitrator (ethanol, methanol, acetic acid, and sucrose - I have tried them all) is the least effective and gives me the greatest problems. I have been extremely impressed with the bioploymers having run two DIY reactors for ~ 6 months. In one system, I feed ~ 1 pound of food a night and not until I added the biopellet reactor did the nitrates drop below 50. They are currently zero and I have turn off both the sulfur and heterotrophic reactor in that system. [/quote]

I’m guessing you test the water coming out of the de-nitrators themselves. how long did it take you to start seeing a difference? I’m starting to think about it now though and i’m wondering if i even will see a difference because of this…

[quote=“kaptken, post:16, topic:6151”]
Yes, Alprazo, the plasti pellets work very well at consuming nitrates and phosphates. you must have a reall good protein skimmer to suck out the excess mulm and bacteria slime they produce, and thus export the trates. [/quote]

that makes me think that the de-nitrator could be working just fine, but i woudn’t see it because it’s not made to export the nitrates, just break them down. am i getting confused here?

Any update on this project?

yeah nothing’s really happened in the two months it’s been set up. i have a feeling the connection between the coil inside and the back of the inlet connector mounted on the cap broke free. this would allow water from the tank to flow directly into the chamber instead of first passing through the coils and de-aerating. when i read up on this project, this was the one connection that wasn’t really clearly described, so i just siliconed it in place, hoping that would be enough. I have a feeling it wasn’t. you may have read that I actually have to break the tank down because I’ll be moving soon, so when I do, I’m actually going to cut the thing open and see if this is what really happened. If it didn’t, then I’ll know the project just didn’t work. at least not for me. either way, it’ll be good for future reference.