So It was time to finally build a canopy after my son said he wanted to have his Birthday party at home.
I went to Home Depot picked up some 1"x10" pine the cheap stuff not the select. I originally was going to have it completely squared with the tank and nail moulding all around as a design anesthetic and to also keep it from moving if it got bumped also I am going to do moulding around the doors. The 2 doors in the front will open upward so when I have to reach my hands in the door does not block my view of anything. I also wanted 2 fans in the side (longest process to decide on which fans) and a vent hole that would be equivalent to the square inches that fans would be on the opposite side.
I accidentally during my tired times of multi tasking around the house ended mounting my side panels on the inside of the front and back so I ended up with a small over hang on the back that turns out to be working out with my wires verdict_in.
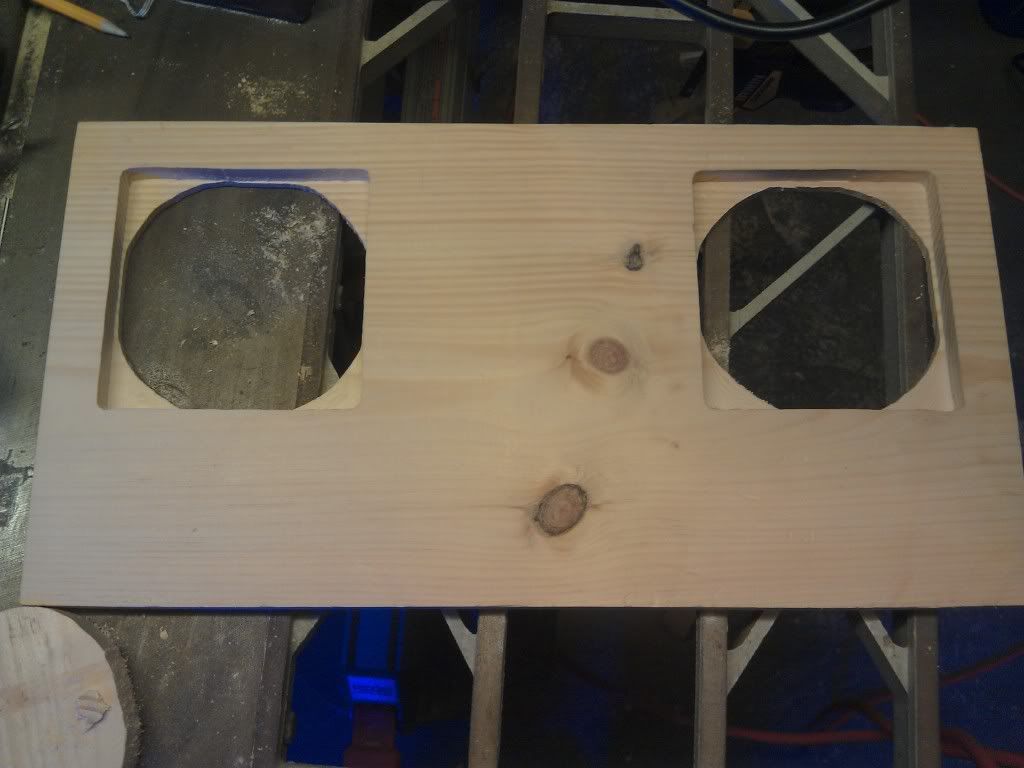
I don’t have all the tools to make the job easier so I used my old craftsman rotory/rotozip that I never used before and a 1/8" cutting drill bit to cut out all my holes. I freehanded everything so it did not come out perfect but pretty darn good. I recessed my fans made the hole to match the fan itself then recessed to fit the whole unit as a square.
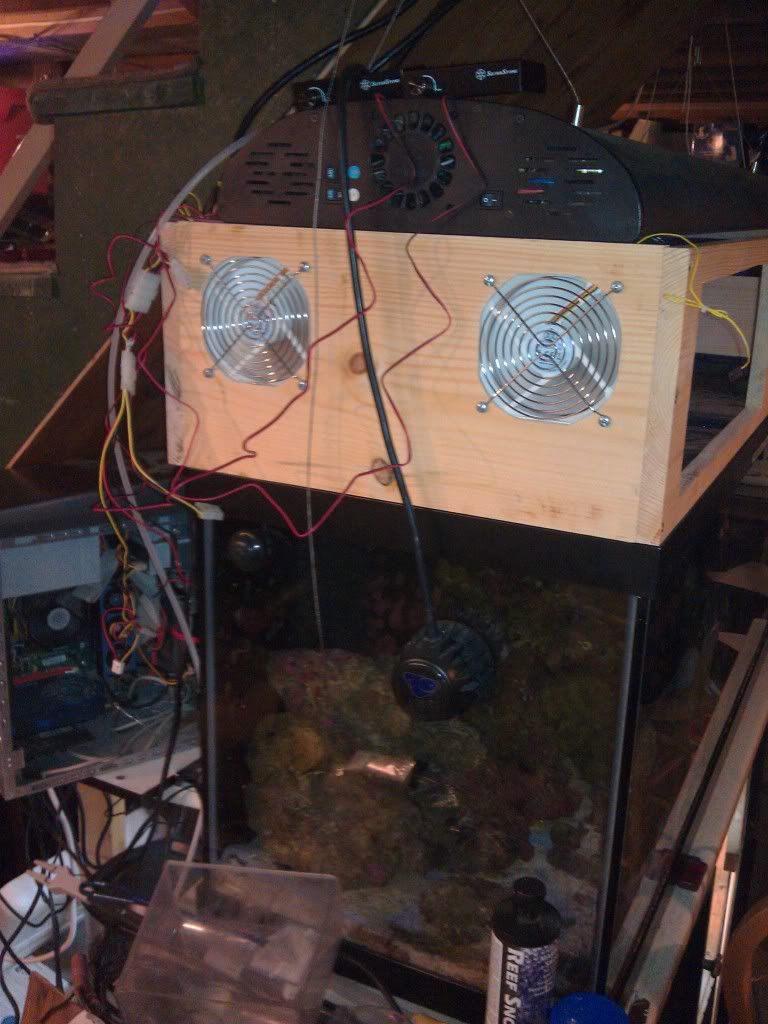
I ended up with Silver Stone FM121 fans they push 110cfm with a noise db at 30. The original fans I was looking at were double the price and pushed 200-280cfm with a db of 61 but on a lot of reviews people complained the fans were louder then the vacuum cleaner.
Right now until I get a 12v powersupply for the fans I have them hooked up to a computer tower by itself just sitting behind the tank on the shelf.
The recessed holes for the fans.
Front view of the fan panel
Shot after just getting it all together
Test fit on the tank
Testing the fans with the speed controllers
Just after getting the doors ruffed in, no moulding yet.
They are a bit noisy. They are basically a beefed up computer case fan for gamers. I could not imagine going with the fans I originally planned to get with those being twice as loud. These fans have a controller so the lower speeds are not loud at all.
I also left enough room in the center to add another fan if the 2 fans can not push enough air out to keep everything cool.
Today I am going to work on the doors and thinking of making them out of fresh wood with a 1/4" rabbeting bit but I do not have a table for a router so not sure how I am going to do it. I was thinking of buying a new router with table mount. Just spent $70 on a router bit set from Home Depot.
[quote=“billrob71, post:4, topic:4757”]
Looks real nice so far ::[/quote]
Thank you.
I had another idea I forgot to mention and see if I can get some advise on.
I want to paint the inside of the canopy maybe with a high gloss black or the fake chrome.
My concern on this is the paint itself as salt creep starts to happen or splashed water that gets on the paint and goes back into the tank. Is there any particular paints you can not use or is it just better to keep it as bare wood or wood with just a sealer?
Most paint the inside of their canopy white as Black absorbs heat and light.
I would use a exterior latex primer and paint, and if you want it to last forever or close to it hit it with a few coats of spar varnish.
The white paint does make sense just like on rooftops in the city it is best to go with white or silver.
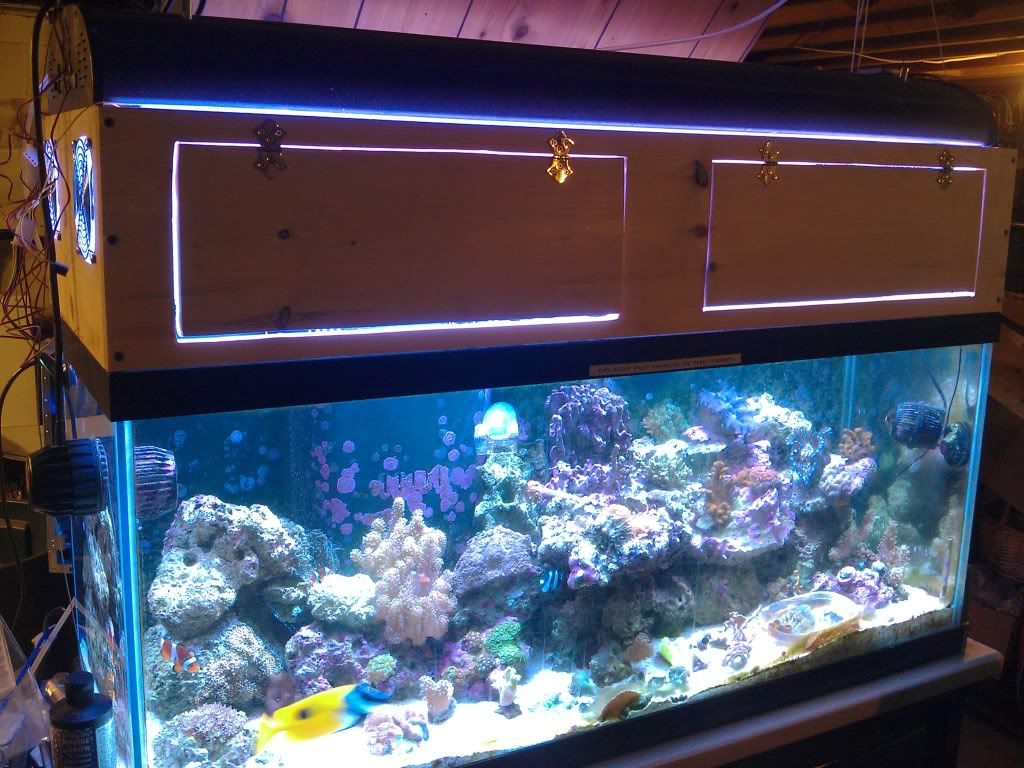
Another thing I noticed today the lighting in the tank looked much better then without the canopy. I thought it might make a difference but was not sure. My fiance noticed it as soon as she looked at the tank.
The 2 fans never let the temp go over 77.8 today. The temp only rose that high because I don’t have the top sealed off yet so it was pulling air from above instead of from the vent on the side so I just placed some 2x4’s on the top seams and temp started going down. I also ran the fans at full power today 220cfm moving that heat right on out.
I think I will cut some 1x to butt up to the light fixture with a bull nose molding on the ends. For another day the rest of my weekend is full and I already cleaned up all my drywall mess and saw dust.
I built a couple of my hoods so that they are about a half inch larger inside than the outer frame of the tank. this leaves a gap for air to chimney up and through the hood and out the open back. 4 VHO in them, 440 watts, rarely goes above 82 during hot summer days. Passive cooling, hot air rises. no fans required. with a tight fit , sealed hood like yours, if the fans fail,you have a toaster oven. but thats just me. too lazy to install fans. Let mother nature and physics take care of the cooling.
I painted mine with oil based primer, and Rustoleum glossy white . inside and out. 7 years old now. only one front door board is cracking. but it was cheap wood.
I have 716 watts 500watts being the metal halides. I had to have a fan blowing on my light fixture or else my temps would hit 80+ and that was without a canopy.
I also had a fan that was bad in the lighting unit itself, which I have ordered and just waiting for it to come in the mail. Newegg.com was fast I ordered around midnight on Monday morning and got them Wednesday afternoon.
Wish I would have known before, this has been a chaotic week for me. with planning for the birthday party today and drywalling and doing the canopy. I would help you if you needed with yours. I have a table saw with a 90tooth blade for very nice smooth cuts on basically any material. The router I have does not mount to a table I would like to get one for future projects with a good sized table along with a radial arm saw table to make the angles easier. The router table would have really helped considering I had to freehand all of my cuts even for the doors.
My mind is so funked today so I hope this makes sense haha. Running on 2 5 hour energy drinks and 4 hours of sleep and I just bought more 5 hours extra strength and a spike all to go down with my mountain dew hahahahaha BoNg
So my crazy weekend is over and I have gotten back to thinking of my canopy build and have come to realize with the way I wanted to do my molding with the hinges I got would restrict it opening. I wanted to do a molding wrapping around the whole door and covering the seams.
I think it might be better to redo the doors and change out to a different hinge that would mount to the inside of the door so it has a wider swing to allow me to have a overhang.
If all works out this will have been more of a tester and I can build a nicer and better canopy with maybe red oak instead.
I am also looking into possibly getting a router table this week. That would help with making better cuts the freehanding it.
I was thinking of that actually. I should have done it. I was running low on clamps for the work piece and did not have enough to do a fence. I would really like a router table with adjustable fence which all are I think.