So a long time ago, i bought frag from ken (thanks ken!) that had a small piece of dragon’s breath macro on it. well, under my t5’s, that small macro turned massive and started growing everywhere. It looked great, but it was starting to overtake my tank. So i pulled most of it out and stuck it in the sump/fuge to provide protection for all the little critters/help with filtration naturally. A while back john had given me some chaeto that i had under a 5500 CFL flood light. Well, the chaeto didn’t make it, but I assumed it was because my phosphates were minimal. It was a slow decline, but a decline nonetheless. well now my dragon breath is starting to do the same thing. so for fear of losing it, i took most of what remained and threw it back in the main tank, where it has already started growing again. I also went onto rapid LED and decided that if i was ever going to do a DIY LED i should probably practice. So i got three cree RB and 3 white (10k or 14k i can’t remember) and have decided to wire them up and stick them over the sump to see what happens. I ordered and three days later had the parts in hand. good stuff. anyway, i will most likely be putting it together tonight, so pics will be on their way soon.
Thats a cool project :![]() : can’t wait to see pics, and results!
: can’t wait to see pics, and results!
Well, i “finished” the project. I was walking through Walmart and came across acrylic bead boxes in the craft section which after taking a closer look i figured with some slight modding would make a perfect container for the fixture. I didn’t realize how perfect it would be until I got the whole thing together, and i have to say, it came out pretty good…
First, i broke out ye ole dremmel and went to town. ignore the half-@$$ job. lets face it, it’s pretty much my trademark at this point. And don’t try to blame it on the PBR at the top. Helps to steady my hand before surgery. Purely for the task at hand i swear…
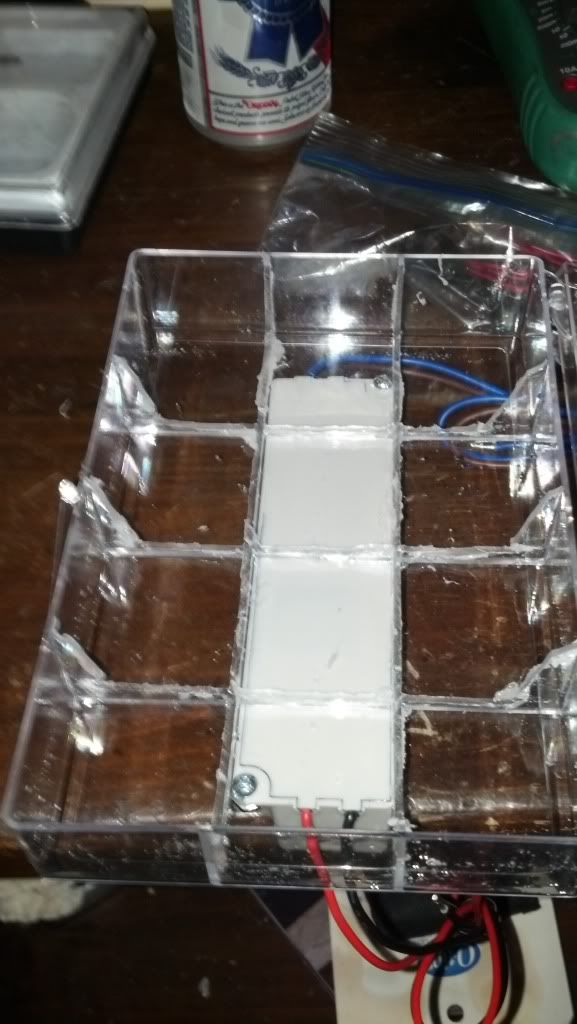
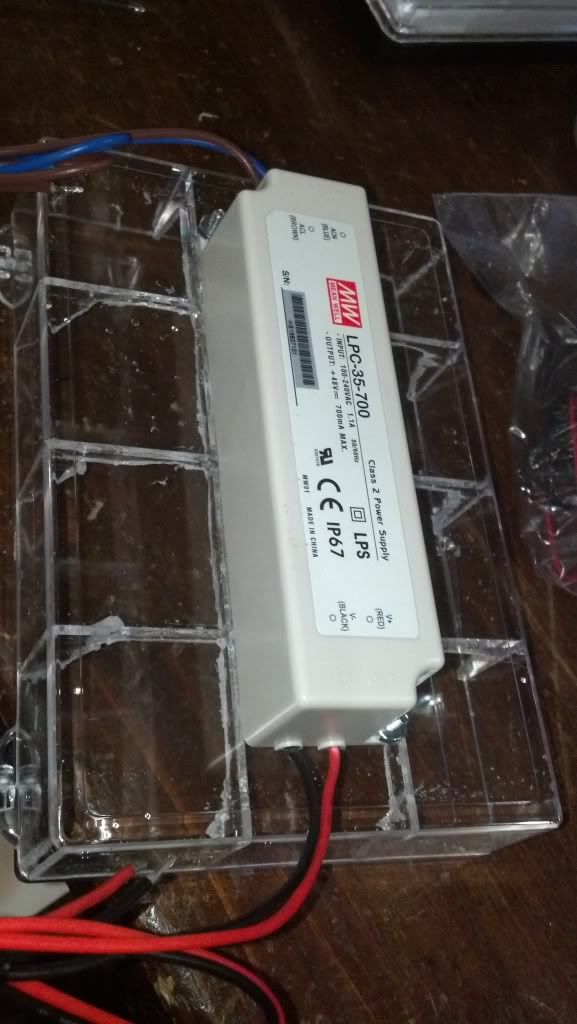
Centered the ballast on top of the container and bolted down with two #6 bolts.
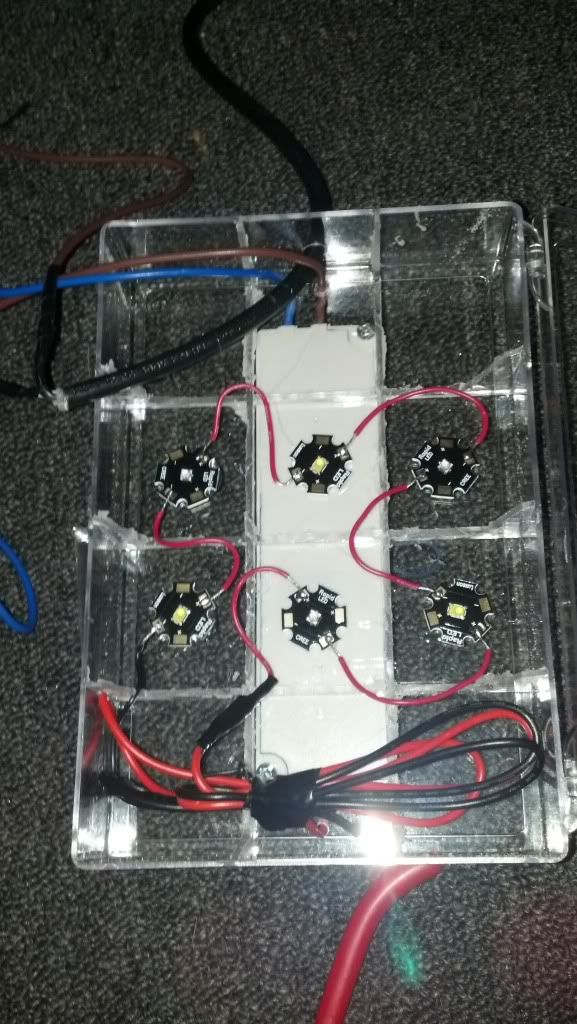
If you take a close look, you can see i drilled holes for the power cord and the wiring for the ballast so that all wiring could be passed through the container. My original intent was to paint the whole container, save obviously for the bottom, but after looking at it, i actually like it more being able to see the components. I’m weird like that. Like i said, the container was perfect size. I was able to bundle all wiring off to the side and still have the six LED’s perfectly centered in the container.
And Alex (god, for all my tank pals know) let there be light!
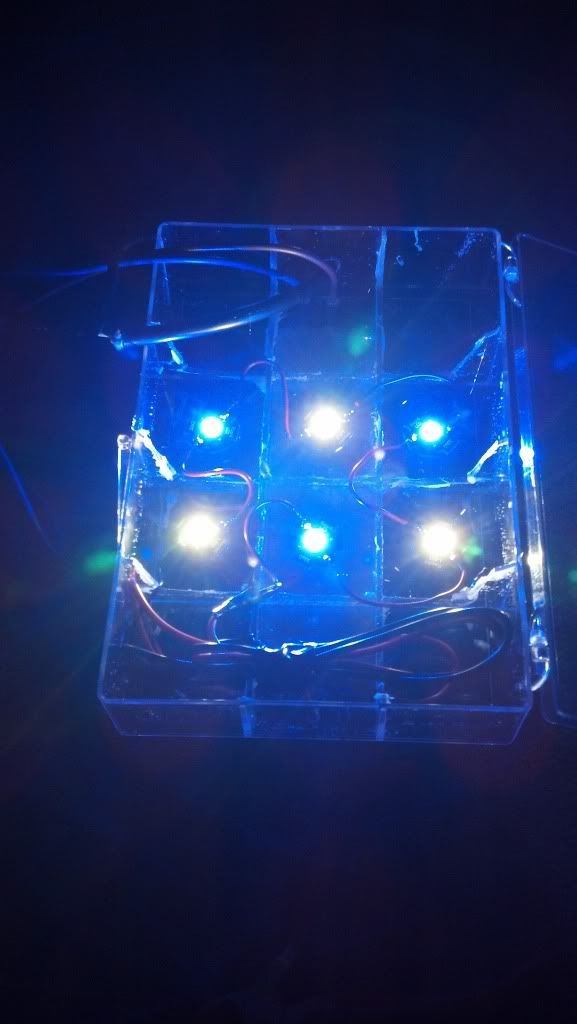
Now for the explanation of the “finished” comment in the beginning. I obviously tested these before allowing them to sit for eight hours un-monitored over my sump the next day and i’m glad i did. I figured how hot could six LED’s get as long as I left the container open? Well the answer is VERY hot. I had originally attached the LED’s with hot glue. Well that melted…in about five minutes…some engineer i am. ::hitsthefan:: So the new plan is to swing by HD or Lowes tonight and grab some c channel, then head to radio shack and buy two mini fans, one for push and one for pull. This might be excessive, but i have issues with unbalanced things… >LOCO<
more to follow…
I was thinking there would be more of an issue from the ballast melting the acrylic.
:![]() :
:
gunna need more c-channel…
From what I can find, acrylic seems to begin softening around 170 degrees. I haven’t had this thing on long enough to know if temperatures get that high, but that seems like a lot. that being said, it is Walmart acrylic so i’ll probably add c-channel just to play it safe.
It does look good, like the container was meant to be… that is …until the melt-down verdict_in
Def try to play it safe, 170 isn’t that hot. Are you planning on mounting the leds to the c channel? is that gonna be the “heat sink”? and what glue are you gonna use now? i thought the leds had some kind of thermal glue they promote using :![]() :
:
my :TWOCENTS is whatever you decide, just make sure the fans are a “bonus” …and not a “necessity”
basically if cheap fans fail during a vacation, would things overheat and get ugly?
Yeah they sell thermal paste at radio shack, but i’ll probably end up using a combination of thermal paste and machine screws as the thermal paste acts to facilitate the transfer of heat from one surface to another. and the machine screws are just because i don’t trust the thermal paste to hold in place. I might stick a turkey thermometer in there and run it for a couple hours just to see where the thermal equalibrium is at. then i’ll know for sure what i’m working with. that is, after mounting LEDs to c-channel and without fan operation.
what they sell as thermal paste is not always a thermal adhesive as paste is referring to the consistency.
Also remember you want a minimal amount as it is only meant to fill in micro defects and so there are no air pockets, metal to metal the the best air is the worst.
Ok, what is being referred to as the “ballast” is really what is known as the driver for the LEDs. The working temp on this driver, according to the spec sheet on Rapid is 70 degrees, so heat from the driver should not be an issue.
Think maybe a good idea to keep the C channel away from touching the acrylic.
[quote=“houndsbayman, post:9, topic:6056”]
Ok, what is being referred to as the “ballast” is really what is known as the driver for the LEDs. The working temp on this driver, according to the spec sheet on Rapid is 70 degrees, so heat from the driver should not be an issue.
Think maybe a good idea to keep the C channel away from touching the acrylic.[/quote]
That is Celsius it’s 158º Fahrenheit
I would buy a heatsink made for these leds instead of a piece of steel at home depot. They use the aluminum heatsinks because aluminum dissipates heat better then steel. You can buy small strips of it for your project at ledgroupbuy or rapidled. I would not worry about mounting the ballast on the fixture itself but rather on the back of the stand or something like that. and with the amount of led’s you are using you should not need a fan just a good heatsink.
[quote=“Hudzon, post:10, topic:6056”]
[quote=“houndsbayman, post:9, topic:6056”]
Ok, what is being referred to as the “ballast” is really what is known as the driver for the LEDs. The working temp on this driver, according to the spec sheet on Rapid is 70 degrees, so heat from the driver should not be an issue.
Think maybe a good idea to keep the C channel away from touching the acrylic.[/quote]
That is Celsius it’s 158º Fahrenheit[/quote]
I think since he will be only running 6 LEDs, that would be under 50% of the rated max load. Therefore the temp should be @ 70 something degrees. But I could be wrong.
[quote=“JustSumGuy, post:11, topic:6056”]
I would buy a heatsink made for these leds instead of a piece of steel at home depot. They use the aluminum heatsinks because aluminum dissipates heat better then steel.[/quote]
Yeah i knew this about aluminum. Since it was only three LED’s on each piece of heat sink, i just got square stock from HD. Drilled holes at either end and mounted them in the container. They do a fine job at dissipating the heat.
[quote=“houndsbayman, post:9, topic:6056”]
Ok, what is being referred to as the “ballast” is really what is known as the driver for the LEDs. The working temp on this driver, according to the spec sheet on Rapid is 70 degrees, so heat from the driver should not be an issue.[/quote]
Yeah that was a slip of words. Probably wrote it when i was exhausted (when am i not?). But you’re right. I’ve left the light running for hours and it doesn’t get more than about 80-90 degrees, if not less. I’m just going by touch and it’s not uncomfortable to hold at all, even after six hours of operation.
I’m on day four with the fixture, after adding the heat sinks and setting it in place, and I gotta say, I’m happy with it. It operates on a timer eight hours a day and does a great job of lighting the whole refuge. There have been no issues with distortion and the container doesn’t get hot at all thanks to the square stock. Even without a fan operating. Now i’m just hoping and waiting to see signs of growth from my dragon’s breath. the stuff grows like crazy under my t5’s. it takes about three or four days to start seeing growth so if the LED’s are any match, then it shouldn’t be long before i start to see results. fingers crossed.
All in all, the project cost was about $50 after square stock, LED’s, wire, driver, case, etc. At first I was considering buying ebay 10W LED’s but after doing a little more reading, i discovered they have about the same output as the 3W from rapidLED and the end cost hardly would have saved me anything at all, so i just took the safe and reliable route and I’m glad I did. As I said, very happy with it.