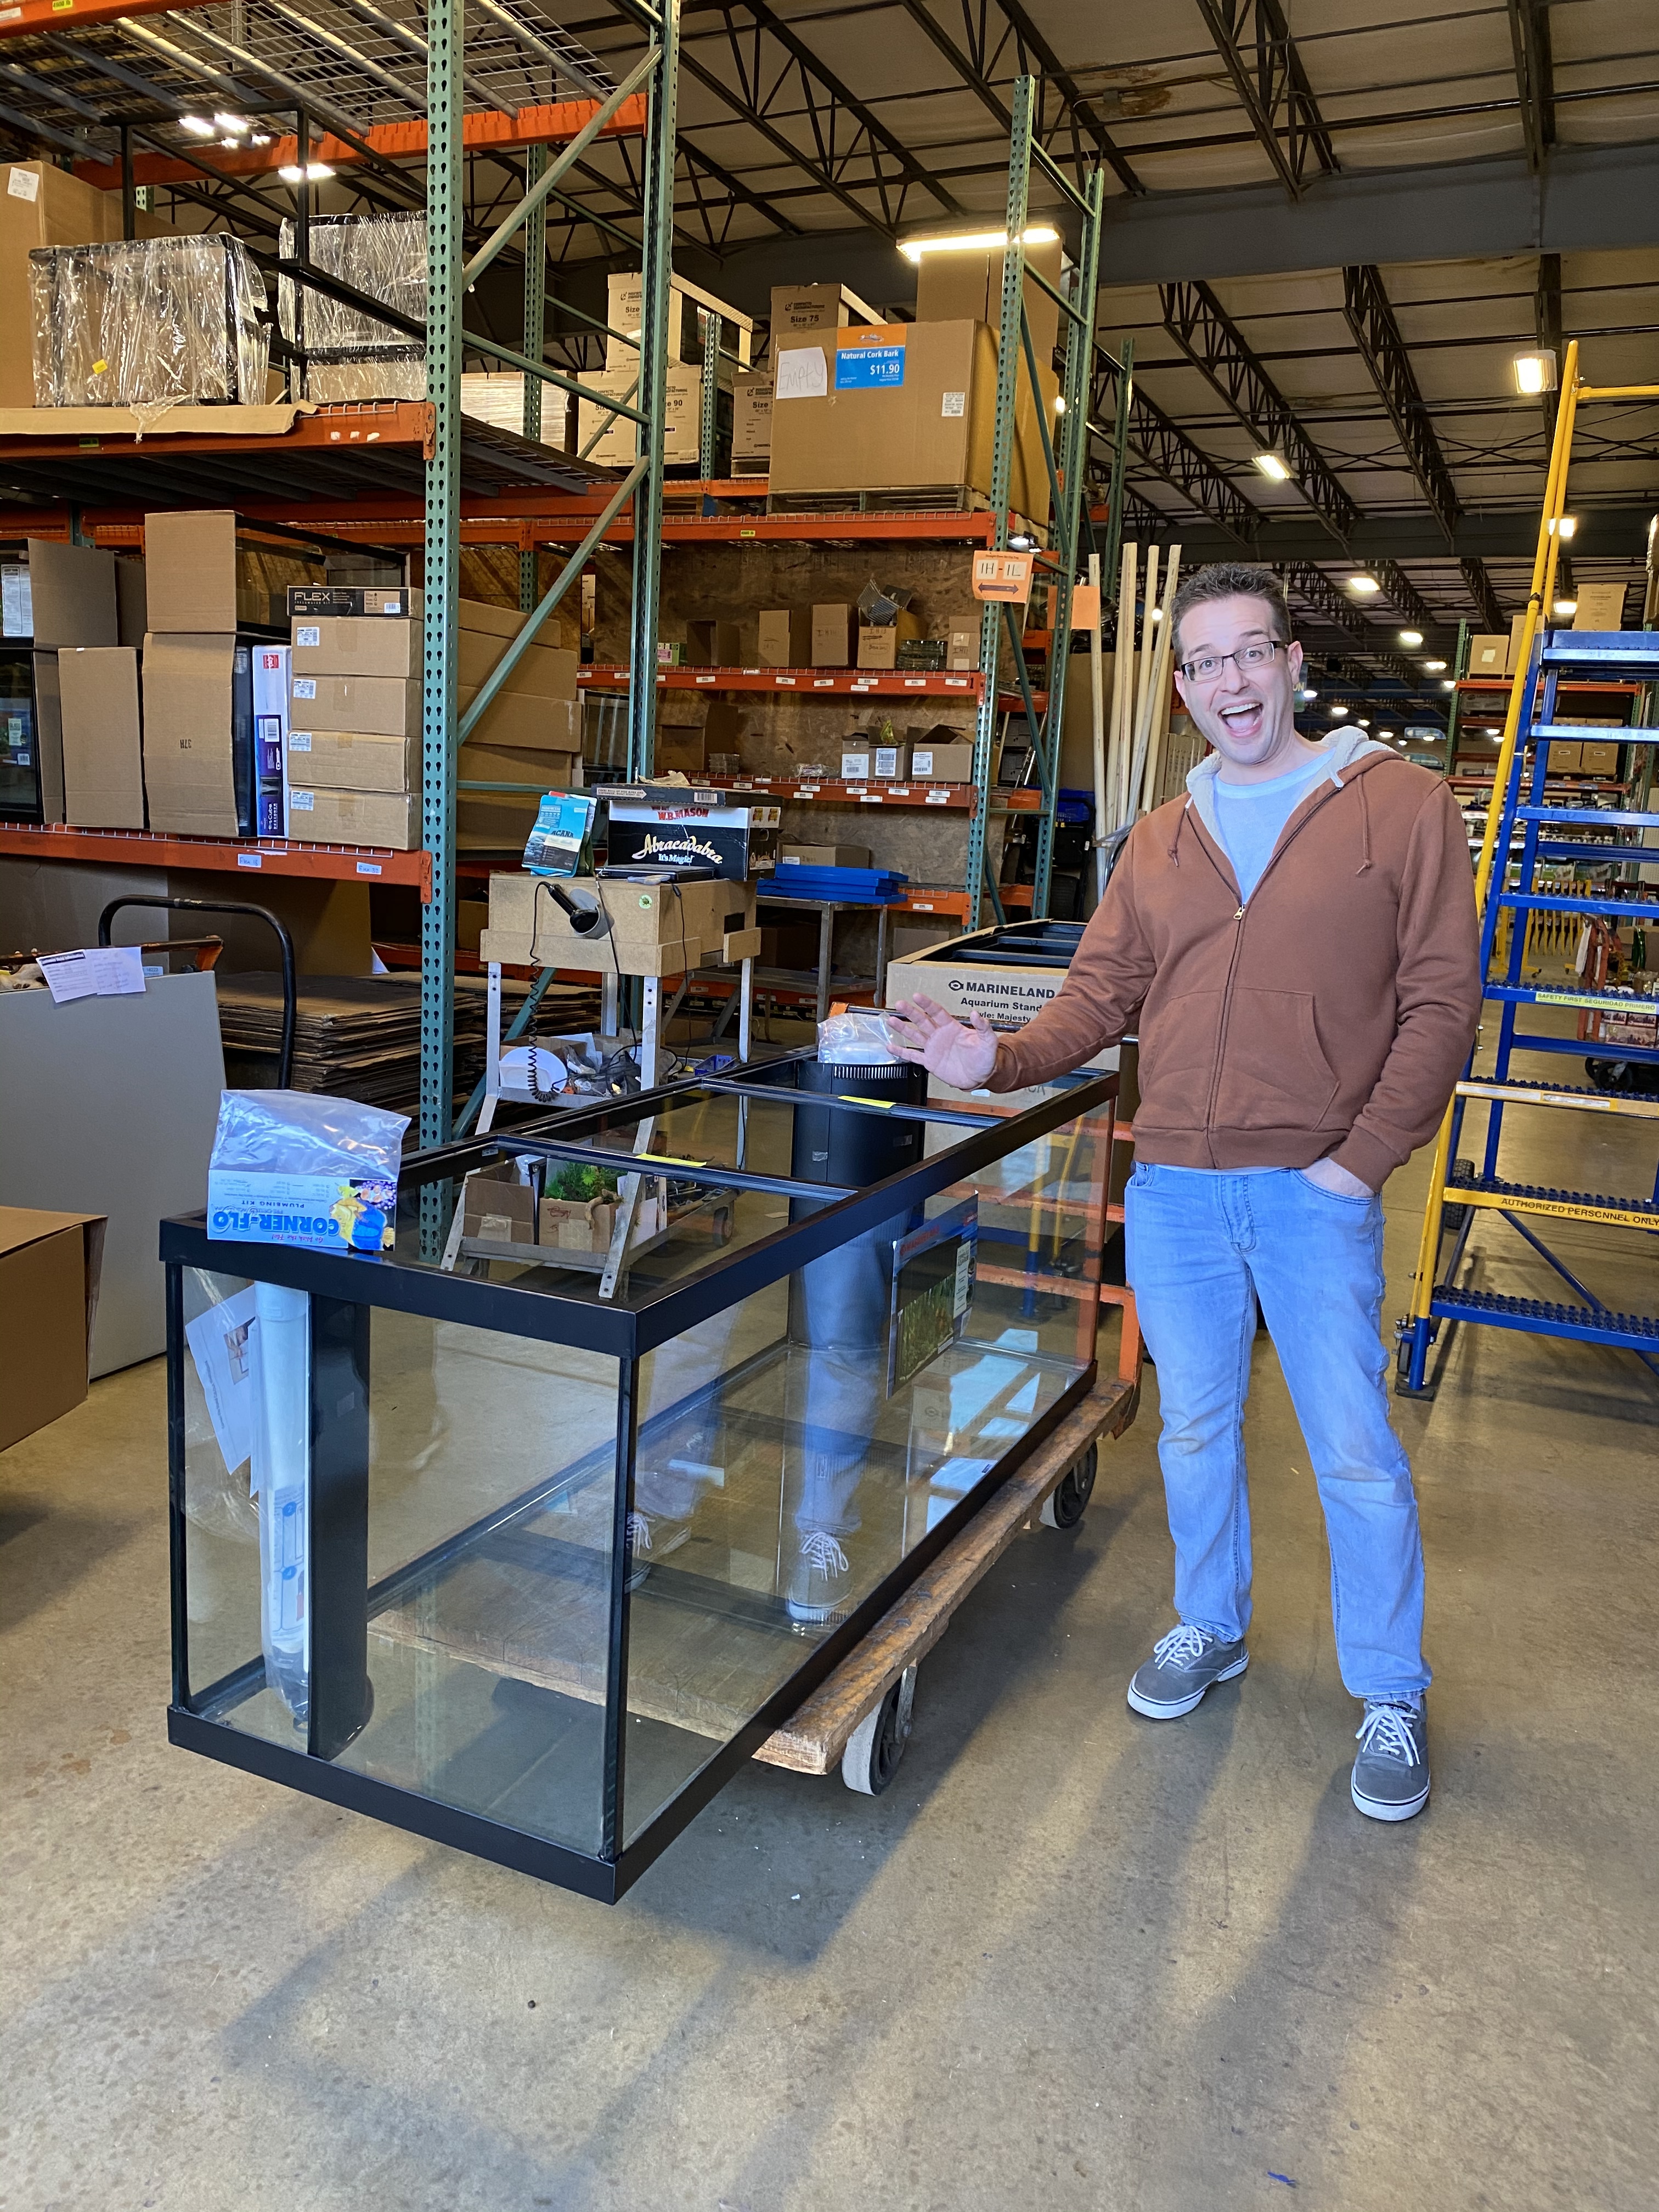
It begins! I got into the hobby a little over a year ago when I converted my 65 gallon fresh water tank into a saltwater aquarium. I learned a lot of lessons along the way about water quality, lighting, bacteria and the fact that you could be successful with very basic, hang on the back equipment. Like most who have been in the hobby for any amount of time I wanted to try some new things. I wanted to be able to purchase larger fish that needed space to swim, try corals that had higher lighting demands than my inexpensive LEDs could provide, add a large sump, experiment with a refugium, and try my hand at some tank automation.
I thought it would be fun to document the process and get some tips along the way. I’m actually about ½ way through the build at the time of authoring this. I’m amazed at all the things I’ve had to consider and some days it seems like I’ll be lucky to have this running before Christmas! What began as a simple idea (just buy a bigger tank) has grown into quite the project. Those of you who have been in the hobby for awhile have encouraged me to enjoy the build so that’s what I intend to do. I’ll try to drop regular updates on the progress along the way. It all started one day when I buddy and I drove to That Fish Place…
3 Likes
Looking forward to seeing the progress. I have a 75 and want a 180 or 225 but just don’t have the area to set everything up properly
Following along! This is gonna be fun.
Update #2 - Getting the tank inside
With the help of a friend, we managed to wrestle the 340lb tank off of the UHaul van without breaking it. In hindsight I probably should have had a larger crew. Fortunately my friend had furniture straps which have a body harness and straps that cradle the object you are trying to move. More of the weight is shifted to your shoulders and legs. It was still a little tricky but much much easier than trying to support all that weight with simply your arms.
Eventually the tank will go upstairs on the second floor but for now we put it in the family room on the first floor. I need to reinforce the floor for the weight and run some additional electric lines first. Fortunately I have a tiny bit of construction experience and an uncle who has been a general contractor for years who is willing to be my supervisor and building inspector.
The kids were a little surprised when they saw the tank. They were mostly surprised that fish tanks come in that size, but not remotely surprised that I bought it. My son is interested in the hobby as well and was impressed that his WIFI worked in the tank stand. I’m a 6’ full grown man so it was a little surreal to be able to lay under the tank while I worked on some initial plumbing and adding LEDs. If I ever need a place to hide or take a quick nap without being disturbed I’ve got a new place I can try out…
Authors Note: I’m actually about ½ way through the build at the time of authoring this. I’m adding these entries to remember the fun I had along the way. I’m also really glad that I put cardboard under the tank. We had to move it to another spot on the first floor and it was able to slide relatively easily given the weight.
2 Likes
Update #3 - painting the back of the tank
Time to paint the back of the tank! Thanks to a nice YouTube video by Billy Pipes I got up the courage to slap paint on the back of a perfectly good, clear piece of glass! If you get the right brand you can use either spray paint or oil based paint. There are two options I’m aware of thatI learned about thanks to forums like this and YouTubers. With either option I’d recommend using painters tape for the edges and making sure the glass is completely clean before you put down the initial coat.
Option #1 - Krylon Fusion All-in-One Spray Paint works fine on glass and can be safely used on parts inside your tank once it is fully cured. At first I was very concerned it would leak something into the water but read enough from hobbyist online to test it out. I’ve used it on plumbing inside previous tanks without issue just be sure to make sure it has fully cured first. I also used it to spray paint the back of a 29 gallon quarantine tank. It turned out nice. Be sure to apply on thin coats or you’ll have drip marks. Because this tank was inside this wasn’t a great option…
Option #2 - Rust-Oleum Protective Enamel Paint which is oil based can also be applied to glass. I used a 3 ½” roller with the thinnest mat I could get my hands on. I applied two very light coats and called it a day.
At this point I was feeling very optimistic about my progress. My uncle was going to come over in two weeks and help me build a load bearing wall under the tank. I also had some movers lined up to move the tank to its final spot on the second floor. Once that happened I was going to cycle the tank. I had all my equipment picked out and simply needed to order it. Since everything tended to arrive in 2 days anyway I was going to order it as I needed it.
Right around this time I also remember hearing strange reports about a virus coming out of China. It was all over the news and it sounded like it was popping up in Italy. While there are more important things going on in the world (people’s health, jobs, etc) COVID-19, social distancing, and the disruption of manufacturing did impact this build much like everything else.
Authors Note: I’m actually about ½ way through the build at the time of authoring this. I’m adding these entries to remember the fun I had along the way.
Looking good! What kind of reef are you planning?
I plan on it being a mixed reef tank. I want to try out keeping a variety of corals and imagine I’ll gravitate towards certain kinds over time. I’m hoping having a larger tank will give me some flexibility and be more forgiving with good husbandry.
Update #4 - Building the custom stand
Authors Note: I’m actually about ½ way through the build at the time of authoring this. I’m adding these entries to remember the fun I had along the way.
It’s April and the COVID-19 stay at home order is in full effect. I live in one of the counties that are considered “ground zero” for PA. How does this a part of the tank build story? Glad you asked…
It’s hard to ignore a 6’ fish tank and stand in the MIDDLE of your family room. Being stuck inside your house 24/7 doesn’t help that problem either. I’m constantly staring at the empty glass and thinking about the build a lot (which can be dangerous). Fortunately I anticipated the shut down and did some frantic trips to the local fish store and Home Depot trip prior to the order to stock up on some of the materials.
The plan is to have a 40g breeder as the sump and a 20g high as a refugium. I’ve done the calculations and they will both fit, but being a “saltwater rookie” I didn’t realize how tight the space would be once both tanks were in place. I also thought I could sneak the 40g in through the back of the stand to work on temporarily but I was wrong.
I knew that once the stand was against the wall the sump could only go in from the top of the stand. Now I can fully appreciate what it would take to break this giant tank down in the future if the sump leaked or I changed my mind. It’s not the 65 or even 75 gallon tank I’ve had in the past. This tank is massive and it takes multiple people to do anything with it. I know myself it’s likely I’ll want to mix up the refugium / sump configuration in the future.
I’ve decided to try to build a custom stand for two reasons. #1 - I wanted easier access to service the equipment. The space is very tight which will discourage maintenance. Not good. #2 - I wanted to be able to pull the entire sump out without having to break down the tank. I might change my mind in the future or avoid total disaster if the sump were to leak. Both seem like solid long term reasons to put in the extra effort now.
The tank stand will be built out of 2x6 following the standard pattern in the “King of DIY” videos. I won’t bore you with the calculations but the design will support 8-10x the working weight of the tank. It’s a 6’ tank and spans greater than 48" need a support. By placing the support at 40" I can now pull the 40g in and out without going in through the top. (It’s the simple things in life.)
It’s a Marineland tank so the tank will only touch the outside edges of the stand. The supports across the top are there to keep the stand square. I added plywood on the top and bottom to ensure the stand stays nice and square. I was very aggressive with the screws as well.
I’ve had construction jobs for two summers but finish work is not my forte. The stand still needs to be painted and I need to figure out doors and access. The fact that I pulled this off without making 100 trips to Home Depot was a small miracle in itself. In other news I have a 180 gallon Marineland stand that I’m willing to sell cheap…
1 Like
Loving these updates! Keep 'em coming!
Could you share the links to the painting videos you found on YouTube? I’m sure they’ll come in handy in the future.
If you are interested this is the video from Billy Pipes on painting the back of your aquarium. He lives in New Jersey if I’m not mistaken so he is someone you might see at a frag swap or who could swing by a club meeting.
1 Like
Update #5 - Finishing the custom stand
Authors Note: I’m actually about ½ way through the build at the time of authoring this. I’m adding these entries to remember the fun I had along the way.
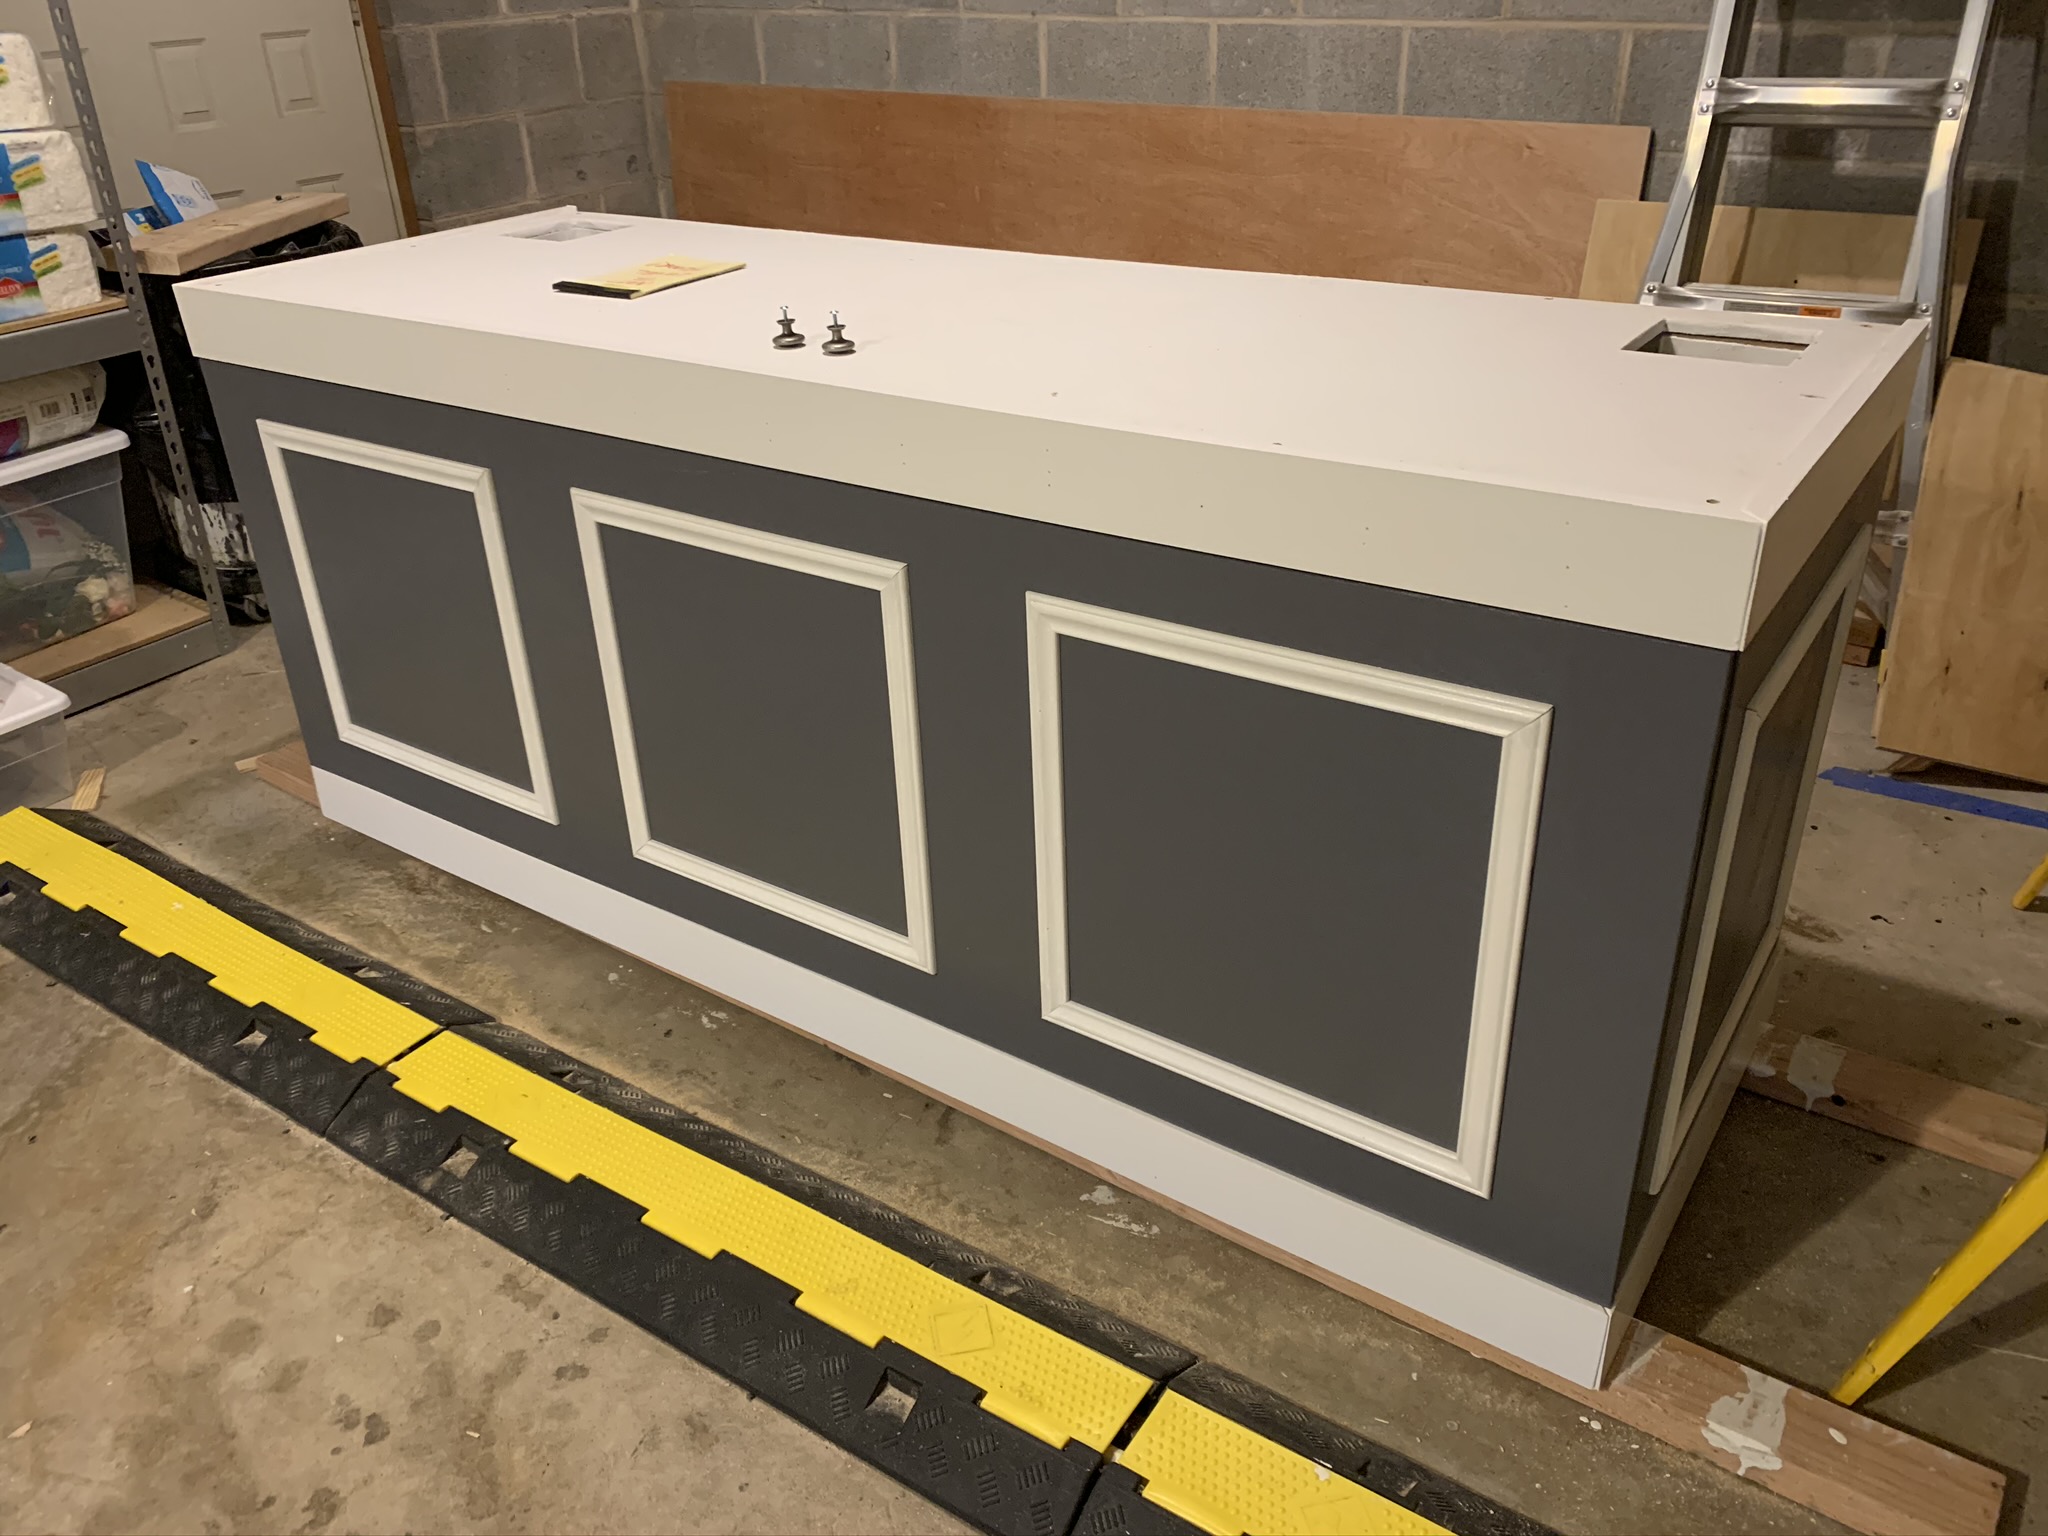
The stand is finally painted and I’ll be happy if I don’t have to touch a paint brush for a while. I decided to paint the stand a light grey with white trim. It was a lot of cuts and a lot of coats of paint. I can’t remember the last time I ate that much saw dust. As I mentioned I don’t consider myself to be a woodworker, but I think it turned out reasonably well. You can see the progress below.
Next I had to decide whether to have doors or removable panels. Since my main motivation for building the stand was ease of maintenance removable panels seemed like the best choice. Thanks to some nice build threads on Reef2Reef I read about Neodymium Magnets. Apparently these tiny, thin magnets are extremely strong and people were using them to hold up panels. I also learned that you could use a Forstner bit to sink the magnets into the wood. Game time!
Armed with this new knowledge I used the Forstner bit to drill about the thickness of a penny into the wood, filled it with crazy glue (because no one said I couldn’t) and then pushed the magnet into the wood. I then added a small layer of crazy glue over the magnet to keep it firmly in place.
Hilariously before the glue was dry the magnets kept flying out of the holes being attracted to each other, my drill, and anything remotely metallic within a foot. For magnets that were next to each other I had to glue them one at a time. Once the glue set everything worked surprisingly well. For the three sides of the stand I used approximately 40 magnets and attached a metal plate to the stand for them to be attracted to. (If you’re interested in specifics I purchased the D10x2mm N42 Epoxy Coated Disc Magnet from Gaussboys Super Magnets).
Finally I decided to drill some holes and run my LED rope light through the top of the stand. Again the cross 2x6 are not load bearing on a Marineland tank so drilling small holes wasn’t a concern. It also was a nice way to keep the lights up and out of the way of the plumbing.
All in all I’m very happy with how the stand turned out. If you decide to build your own stand some day just take your time and be sure to have the right tools. If you do it is very doable.
1 Like
The stand looks great! That’s pretty funny about the magnets, but I’m sure it was frustrating at the time. 
Following this thread with interest. Cool build
Update #6 - The sump
Authors Note: I’m actually about ½ way through the build at the time of authoring this. I’m adding these entries to remember the fun I had along the way.
Time to build the sump! Now in case you forgot by the title of the thread I’m a rookie and it wasn’t long ago that I didn’t know what a sump was or why someone would want one. As I was researching the hobby I realized they were VERY useful although I’m still trying to explain to my brothers why you need a “tank under your tank”. I considered buying a pre-made sump but opted to build my own to save a few $$$.
A few months ago decided to take a practice run at this by assembling a 29 gallon quarantine tank complete with sump. It was the first tank I drilled, I bought a custom overflow box off of Amazon, and got glass baffles cut at the local glass place. The entire setup including the stand was under $200 and I learned how to drill a tank, insert bulkheads, use silicone, and (after a few attempts) how to make an overflow drain run quietly. Now it serves a nice QT when I need it.
For this build I decided to use a 40 gallon tank and combine it with a Fiji Cube Sump Baffle Kit. For me this was a really nice compromise between a nice looking sump and was still less than ½ the cost of something like a Trigger system. It also lets you space out the sections of the sump however you would like. I’ve used Clear Aquarium Silicone Sealant by ASI (Amazon) on both builds and have been happy with the results. Even though the silicone doesn’t actually bond the glass tank to the acrylic baffles they seem to be held in place quite nicely.
Next step…the refugium.
1 Like
Nice! I find going the DIY route makes you feel more connected with your system. Love the idea of pea ting on a QT system. Everyone should have and use one!
Update #7 - The refugium - Dad what’s with all the fish tanks?!?!
Authors Note: I’m actually about ½ way through the build at the time of authoring this. I’m adding these entries to remember the fun I had along the way.
My kids are aware I have a saltwater fish problem but sometimes my behavior still catches them off guard. “Dad what’s with all the fish tank?” my daughter asked me as she came into the garage. Now personally I don’t think there is anything wrong with having a 40 gallon tank, two 29 gallons, two 20 gallon, and two 10 gallon tanks strone about your garage as you are trying to find the perfect combination of sump and refugium (not to mention an unusual concentration of PVC pipe and fittings all over the floor and a 180 gallon tank in our family room). Apparently she didn’t get the memo that this is a normal part of the hobby.
I know there are a lot of interesting techniques you can try with a refugium for nutrient export and to bulk up your pod population. They are also a great place to add some extra rock. I wanted to be sure I could try some of these techniques in the future.
In this hobby there are a lot of ways to be successful but I liked the idea of having separate tanks for the fuge and my equipment. The display tank has two 1” drains and two 1” returns. I had read trying to run two separate returns from two sumps\fuges was a bad idea because you could never keep the returns totally balanced. The big question then was how to “connect” the two tanks.
I wasn’t crazy about plumbing the two tanks together into one massive sump. Keeping them as two separate tanks provided one less opportunity for leaks and would make it easier to swap out tanks if I changed my mind in the future. If I went with a sump larger than the 40 gallon tank I wouldn’t be able to take it in and out of the stand. Definitely didn’t want to sacrifice that.
I decided the right solution for me would be to use gravity to drain the refugium into the sump. A 20 high tank was the perfect size and I built a small stand to get it high enough to drain into the second tank. I drilled two 1” returns and added uniseals (link) with one being the primary and the other higher as an emergency drain. Using some egg crate (link) and zip ties I fashioned a way to keep chaeto and larger animals out of the return area. I also plan to add unions to the plumbing so I can bypass the refugium altogether and have both drains go directly into the 40g sump. Options. Gotta have them.
The primary return on the refugium bypasses the filter socks and skimmer section of the sump to encourage the pod population to find its way back into the display tank. The emergency return is going to flow into a first section where the filter socks are minus the sock. The theory is the noise of the draining water will alert me that the primary drain is clogged. I also plan to water sensors on the floor of the stand in case something catastrophic happens. Here is what the two tanks look like together:
It’s a fairly simple setup but that was the intention. Time to order some rock and think about aquascaping…
Update #8 - Aquascaping
Authors Note: I’m actually about ½ way through the build at the time of authoring this. I’m adding these entries to remember the fun I had along the way.
There are a lot of interesting aspects of this hobby and a lot of skills you can learn. Aquascaping is one of those aspects. On the one hand the bacteria and pods don’t care how you stack your rocks. On the other hand allowing room for corals to grow, hiding spots for fish, trying to eliminate dead spots, creating swim throughs, and making it look awesome all at the same time takes a little thought and planning.
What makes a “scape” look good is very much personal preference. Personally I wanted to have some negative space and ensure there was plenty of room for fish to swim in front of and behind the scape. The plan is to have tangs and other fish that like to cruise around. I also wanted to create some interesting shelves to look at, ensure that the scape was extremely stable, and be able to easily change the scape in the future. In short it needed to have:
- Open space
- Interesting shelves
- Room for coral growth
- Swim lanes in the front and back
- Hiding spots
- Minimal dead zones
- Lots of swim throughs
- Extreme stability
- Ability to change it in the future
- Be awesome
I decided to use a combination of Marco Dry Rock and Marco Shelf Premium Dry Rock. I also purchased several large foundation pieces and several small foundations. The foundation pieces are cut smooth on one side of the rock. You place the smooth side against your bottom glass and cement the rest of your scape to the natural looking top. This gives you an extremely stable and natural looking base which slopes down naturally into the sand.
I also wanted to avoid having a giant, heavy scape that was difficult to change or move. To achieve this I created four large “scapes” that can be independently moved around and multiple tiny scapes that can be stacked on the larger ones. You can see an example of this on the far right but most blend in without be able to be noticed.
I used E-Marco-400 Aquascaping Mortar to hold the rocks together. I purchased two kits although only really needed one. Although very pricey for what is basically hydraulic cement, it was easy to work with and has a very strong bond if you let it cure properly. If you are cementing multiple rocks on top of each other it is a good idea to let each bond fully cure before cementing the next rock. This prevents any shifting while the cement cures.
All in all I was happy with how it turned out. I’m by no means artistic and knew I would be looking at this for a long time to come. Having interesting pieces of rock to work with does make the job a lot easier. There is only so much you can do with round rocks.
Now that all the cement is dry it’s time to start cycling these rocks…
1 Like
That’s an interesting idea with the base rocks. Makes total sense!
I spent some time when I first setup my cube looking into what it takes to make a visually appealing scape. It turns out there’s some science to it. The Fibonacci sequence (or rule of thirds in photography) explains some of how our brain perceive something to be pleasant to look at. I wrote something up about this at one point, but I can’t remember where… I’ll find it and post it elsewhere so I don’t hijack your thread
EDIT: I found it, but it was from my old 75g and on my olllllllld website. This is hilariously bad. I’m going to post a thread now…
Update #9 - Curing rocks - Dad what’s with all the trash cans?
Authors Note: I’m actually about ½ way through the build at the time of authoring this. I’m adding these entries to remember the fun I had along the way.
“Dad what’s with all the trash cans?” my daughter asked. As mentioned my children are used to strange behavior related to this hobby but are still regularly caught off guard. “I’m just cooking rocks.” I said casually. “Is this the last time something strange will appear in the basement because of your fish tanks?” she asked. “Probably not.” I said.
Now that the scape has been created and the mortar has had time to fully cure I wanted to begin curing the dry rock. To do this I turned to the trusty brute trash can. After soliciting some input from other hobbyist I went with a very simple set. I added a Kedsum 660gph pump for flow, one softball size rock from my existing tank to help seed the bacteria, and am phantom feeding with the dry fish food I’m using in my current tank roughly every 1-2 weeks. At this point I now own four Kedsum pumps. I don’t use any of them continuously but think they are a very nice value for utilitarian functions. It took two trash cans to fit everything and I added a rubber hose to have the water run in a whirlpool pattern.
Related to this topic I recently heard an interesting story from about another club membe. He recently went from a 90 gallon to a 120 gallon tank and commented that it took almost a year for his tank to fully settle down. I’ve been thinking how long it would take the new tank to settle and his experience surprised me. Perhaps naively I was thinking that I could take everything in the 65 gallon tank, plus the additional cured drive rock, plus some live sand and be off to the races.
Frankly this had made me reconsider my entire plan. Perhaps I’ll keep the 65 gallon tank up and running while I’m dialing in the 180 gallon the first year. There are two drawbacks to running both. I will have to move the 65 gallon (currently sits in the location of the future tank) and the move itself will likely set the tank back. I’d be curious to hear from others how long this is (months?). Second it is a lot more work and additional expense to maintain the two tanks. The positive would be that I would be far less tempted to rush the new tank.
In either case I’ll need to be patient. This story also highlights the value of being part of a club. While the online forums have been tremendously helpful, being able to hear people’s first hand experience in the hobby is very different. Besides it’s fun…
1 Like
Hi Adam,
That was me, of course, with the 90 to 120 switch. I’d be curious to hear what more seasoned reefers think. It could be that I was not cautious enough with my feeding and then when I added the dosing of Reef Roids, I really sent things over a Phosphate cliff. Hard to know. You might be just fine if you don’t make those mistakes I made.
The new build looks great and is making me dream of a 180 again . . .
1 Like