Since this club lists the aquarium center in clementon Nj as one of their stores…you guys can visit there-they use and endorse aqua gold and othere nat’l fish pharm meds…in fact all their fish are treated in copper made up by nat’l fish pharm for them…
[quote=“IanH, post:37, topic:1193”]
Looking good, what kind of sand are you using? Looks nice, my sand is turning green from coraline.
So no other filtration in this tank besides the hang on I see and the live rock? How about some macro algae in the sand?[/quote]
i used 2 bags of carib sea argonite…just running carbon right now adding a skimmer in a week or so after the tank is done cycling that coupled with a hob refugium and LR will complete my filtration
[quote=“hottuna, post:38, topic:1193”]
RE : cycling with damsels… I just cycled a tank with a flame angel and purple tang…but before you get excited = I used a product called aqua gold 48 hours prior as per instructions…no ammonia or nitrite problems…fish just sailed through the cycle…
product is by nat’l fish parm…enzymes + bacteria…it really seems to work well…
saves fish lives , too[/quote]
thanks i’ll have to check that out…i used water and sand from a friends tank to kick start the process
update:
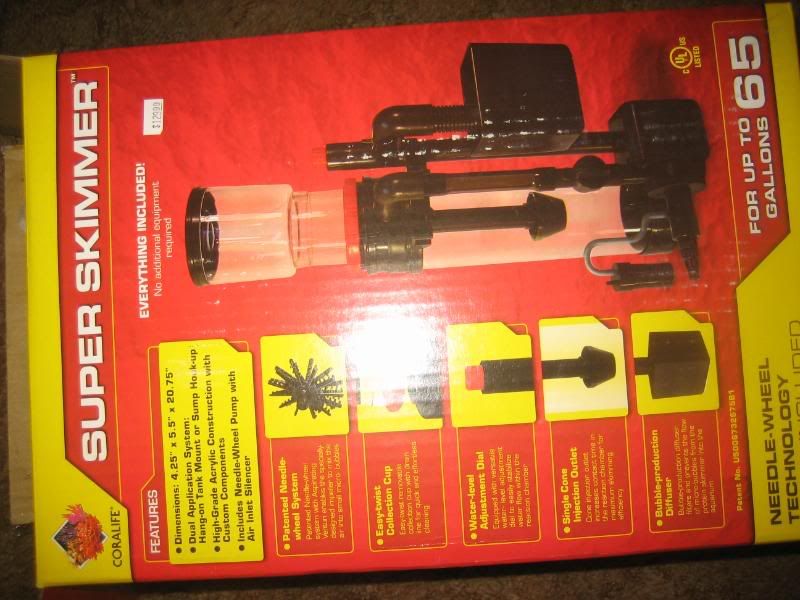
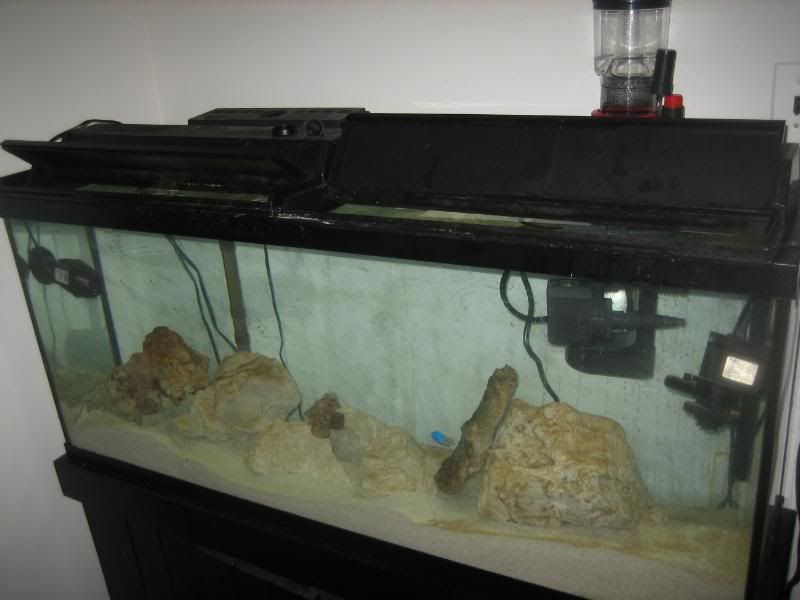
went out today and purchased my protein skimmer took about an hour to set up! with some tweaking also bought a glass hydrometer like the ones i used in all of my university chemistry courses…had to throw that in there before everyone jumps down my throat about refracometers! lol… the POS plastic instant ocean one is going to be smashed into oblivion considering it measures the specific gravity of distilled water @ 1.022 after soaking in acid solution over night!!! i dunno why the even sell these things…anyway damsels are 100% ok contrary to popular belief …i will be adding some inverts next friday hermits and some cleaner shrimp started to notice some diatoms colonizing the surfaces on my substrate and rock …good sign the cycling process is in effect…in looking at all of the equipment im considering adding a sump now that i have everything set up just isn’t as aesthetically pleasing or maybe adding some more live rock to conceal the pumps and heater…


is there anything under those rocks besides the sand? i usually use pieces of tonga to hold the rocks up, then add the sand around…you may want to watch out if you add a fish that likes to dig/sift.
[quote=“IanH, post:34, topic:1193”]
I think you guys are idiots! You actually add up how much $$$ you spent on your tanks! I’d never do such a thing! There are somethings best left unknown…
So did the cloudiness clear up yet?[/quote]
wow he’s got a 55 at 1100 bucks, thats a good start
i’m at $2163 and only have water rock and sand in it lOl
[quote=“longballz84, post:45, topic:1193”]
is there anything under those rocks besides the sand? i usually use pieces of tonga to hold the rocks up, then add the sand around…you may want to watch out if you add a fish that likes to dig/sift.[/quote]
no there isn’t any type of rock foundation might have been a good idea to have added one but i wanted to keep the natural non-uniform bottom… im considering changing the rock work now to kind of a pillar on one side to block the equip … i could add the tonga branch on the bottom of that or i could drill the rocks and add a support hmmmmm decision i decisions
[quote=“TimH07, post:46, topic:1193”]
[quote=“IanH, post:34, topic:1193”]
I think you guys are idiots! You actually add up how much $$$ you spent on your tanks! I’d never do such a thing! There are somethings best left unknown…
So did the cloudiness clear up yet?[/quote]
wow he’s got a 55 at 1100 bucks, thats a good start
i’m at $2163 and only have water rock and sand in it lOl[/quote]
ouch what size is your tank?
technicly a 75, but its truely a 75 with 55g sump so you have to count that tank expense, plus the acrylic baffles i made, skimmer, rock, sand, RO/DI water, alot of PVC and so on
[quote=“TimH07, post:49, topic:1193”]
technicly a 75, but its truely a 75 with 55g sump so you have to count that tank expense, plus the acrylic baffles i made, skimmer, rock, sand, RO/DI water, alot of PVC and so on[/quote]
the prices do add up…if i end up installing a sump i’d prob construct it myself as well been reading a lot of the DIY threads
bought some new toys today from fishman
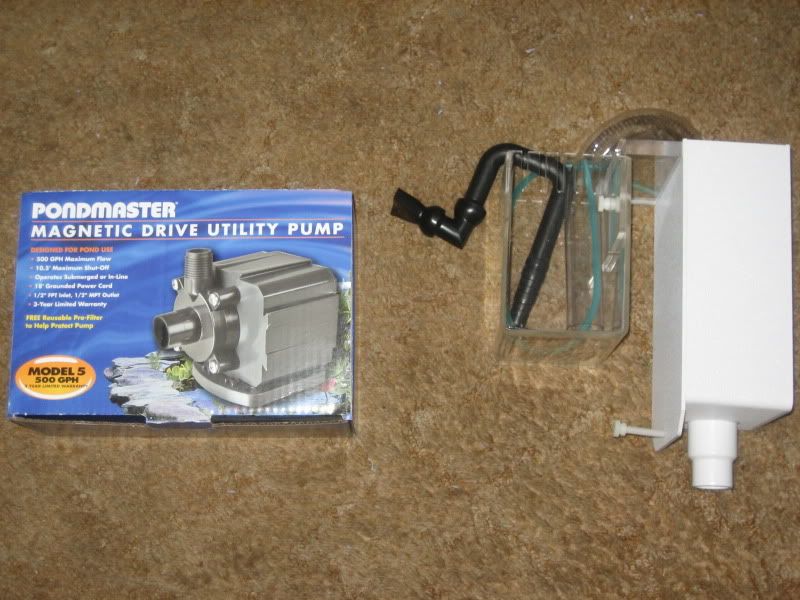
…decided i’m def adding a sump… the whole sumpless thing last about 3 weeks just enough time to get my tank cycled …had a few questions as to which type of plexy glass to use for the baffles??? … gonna go with a 20 long partioned into 3 areas so i can incorporate a refugium
any type of 1/4 inch or 0.22 inch acrylic they sell at the hardware stores will do. In fact, i just siliconed a 12" high by 18" wide 1/4 inch acrylic baffle into my 40 breeder sized home made acrylic tank, for a new sump. Im about to fill it now and see if it holds the load. It should, feels solid. I just cut the acrylic to a snug fit, set it in place, and ran some blue painters tape 1/4 inch from both sides of the joints to make a clean bevel. then layed down some silicone and one quick smooth with my finger to make a bevel. both sides. then peel out the tape and its a clean silicone seal. . it cured overnight, so should be ready.
I used to be skeptical of the silicone seal, but seems to work good. the frameless tanks are made that way, so who am i to doubt them. I didnt get much in the joint between the baffle edge and the side of the tank though. tight fit. but the bevels should hold fine. only 12 inches of water max on it. to form the fuge area for sand and chaeto. and the good thing is, should i want to modify it someday, the silicone is removable with a razor. better than using acrylic glue. which is permanent .
Maybe Al has some more tricks for working with silicone. he has been researching how to make his new frameless glass cube tank with just black silicone seams.
[quote=“kaptken, post:52, topic:1193”]
any type of 1/4 inch or 0.22 inch acrylic they sell at the hardware stores will do. In fact, i just siliconed a 12" high by 18" wide 1/4 inch acrylic baffle into my 40 breeder sized home made acrylic tank, for a new sump. Im about to fill it now and see if it holds the load. It should, feels solid. I just cut the acrylic to a snug fit, set it in place, and ran some blue painters tape 1/4 inch from both sides of the joints to make a clean bevel. then layed down some silicone and one quick smooth with my finger to make a bevel. both sides. then peel out the tape and its a clean silicone seal. . it cured overnight, so should be ready.
I used to be skeptical of the silicone seal, but seems to work good. the frameless tanks are made that way, so who am i to doubt them. I didnt get much in the joint between the baffle edge and the side of the tank though. tight fit. but the bevels should hold fine. only 12 inches of water max on it. to form the fuge area for sand and chaeto. and the good thing is, should i want to modify it someday, the silicone is removable with a razor. better than using acrylic glue. which is permanent .
Maybe Al has some more tricks for working with silicone. he has been researching how to make his new frameless glass cube tank with just black silicone seams. [/quote]
thanks for the info…what type of silicone did you use?? i’ve read some contain anti mold chems
it doesnt take very much silicone. i just used a couple squeazes out of a tube of AQUARIUM silicone i bought at HD or Lowes. a 2.8 oz tube. only used a little for one baffle. could prabably do half a dozen more with it. it has no additives.
i used an entire tube of 2.8 oz silicone PER baffle, 4 baffles 4 tubes LOL (my baffles are large though)
and they are sturdy, i accidently hit one with my magdrive 9 like a wrecking ball by the cord and it didnt even vibrate lol.
pro tip… wear a glove, squeeze some on your finger, then rub it into the seam, repeat (i used pieces of eggcrate scrap to shim the baffle into place because mine were 1/16 shy of being snug)
Hands work but to get clean and solid baffles here is what I would do
Cut acrylic about 3/8" to 1/2" smaller then the inside diameter of the tank which will leave 3/16" gap on both sides of the tank. Use painters tape and mark out the baffle area leaving 1/2" extra space around the baffle. So if you used 1/4" acrylic and leave 1/2" in the front and back of the baffle, tape a space that has 1 1/4" of space in the center. Lay down a bead of silicone in the center of the taped area on both sides. Place acrylic and tape/wedge in place. Using a finger or half a Popsicle stick (I have a plastic tool I cut to make clean acrylic seams) spread the silicone up the seam. Remove the tape before the silicone sets.
If you plan to use a raised baffle put a piece of wood to hold up the space under the baffle. With 2 spaced baffles they can be done at the same time. If you use 3 that are over and under the silicone the center baffle first let it dry then add the 2 remaining baffles
I would not use 4 tubes to do a set of baffles. Use Ge window and door silicone which does not have the mold inhibitor works fine for < $3
I included a quick pick to show tape placement.
baffle.bmp (397 KB)
Use Ge window and door silicone which does not have the mold inhibitor works fine for < $3
+1 GE II door and window is the way to go, although just about any will work, the mold inhibitor is more urban legend than anything. definitely dont waste your money on “aquarium” silicone.
I would not use 4 tubes to do a set of baffles.
+1 a little goes a LONG way. i tight seam works much better than globs. the tool al has you can buy in the flooring section for about $3 and it works like a charm.
:TWOCENTS i would always use glass instead of acrylic. the bond between glass/silicone is MUCH better than glass/acrylic and will last longer. also, glass is cheaper, cleaner, and you can get it cut/beveled for next to nothing. what i would suggest is making a template with a piece of cardboard for your baffles. that way you know the fit perfect. take your templates to a glass shop, usually they will have scrap glass for next to nothing and will cut for free and bevel the top edge. the last sump i built for a friend i had all the glass cut and beveled at lowes for about $5.
[quote=“a1amap, post:56, topic:1193”]
Hands work but to get clean and solid baffles here is what I would do
Cut acrylic about 3/8" to 1/2" smaller then the inside diameter of the tank which will leave 3/16" gap on both sides of the tank. Use painters tape and mark out the baffle area leaving 1/2" extra space around the baffle.[/quote]
in cutting the acrylic or glass 3/8 to 1/2 smaller then the tank am i doing this to allow for room for the silicone or does it serve another purpose?
thanks again everyone for the input this is going to be my weekend project… picked up a CFGI outlet which i’ll wire in as well figured its probably a good idea (don’t tell my landlord im re-wiring my apt) lOl
in cutting the acrylic or glass 3/8 to 1/2 smaller then the tank am i doing this to allow for room for the silicone or does it serve another purpose?
no purpose other than being able to manuever the baffle into the tank. the tighter the better. thats why i like making templates.
:TWOCENTS about the GFCI. if you are talking about replacing an in-wall outlet with an in wall GFCI i wouldnt do it for several reasons. first its unlikely that the outlet is a terminating outlet and its always a good idea to only install a GFCI on a terminating outlet. some GFCI’s dont even have terminals to daisy chain. also, i would make sure to have your return pump and/or powerhead not on a GFI. its not fun to crash a tank because of a tempermental GFI. have you considered getting an in-line one instead? or, better yet, maybe just an enclosure and some drip loops?